在armbian 上安装klipper
git clone https://github.91chi.fun//https://github.com/Klipper3d/klipper.git
./klipper/scripts/install-octopi.sh
git clone时采用了加速链接,如果访问github没受限的话,当然也可以使用原始链接。
运行安装脚本,会自动安装octopi 和 octoprint 以及相关的必要包,由于此前的octoprint是安装在虚拟环境中的,应该不会冲突,先看下情况。
下载的内容还挺多的,务必确认系统的源已经更换为国内源,这点很重要。
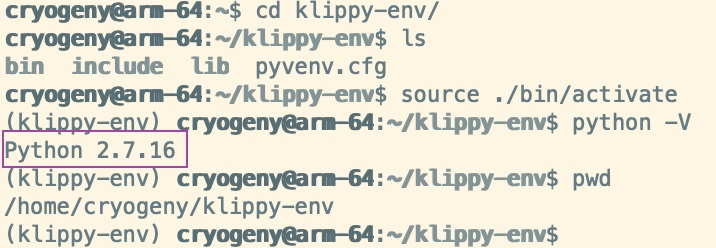
运行完毕后,其默认创建了python2.7 的虚拟环境,/home/cryogeny/klippy-env
编译和刷入单片机
cd ~/klipper/
make menuconfig
如果提示权限问题,前面加sudo 或者将此文件夹权限转移给登陆的用户
运行以后需要选择
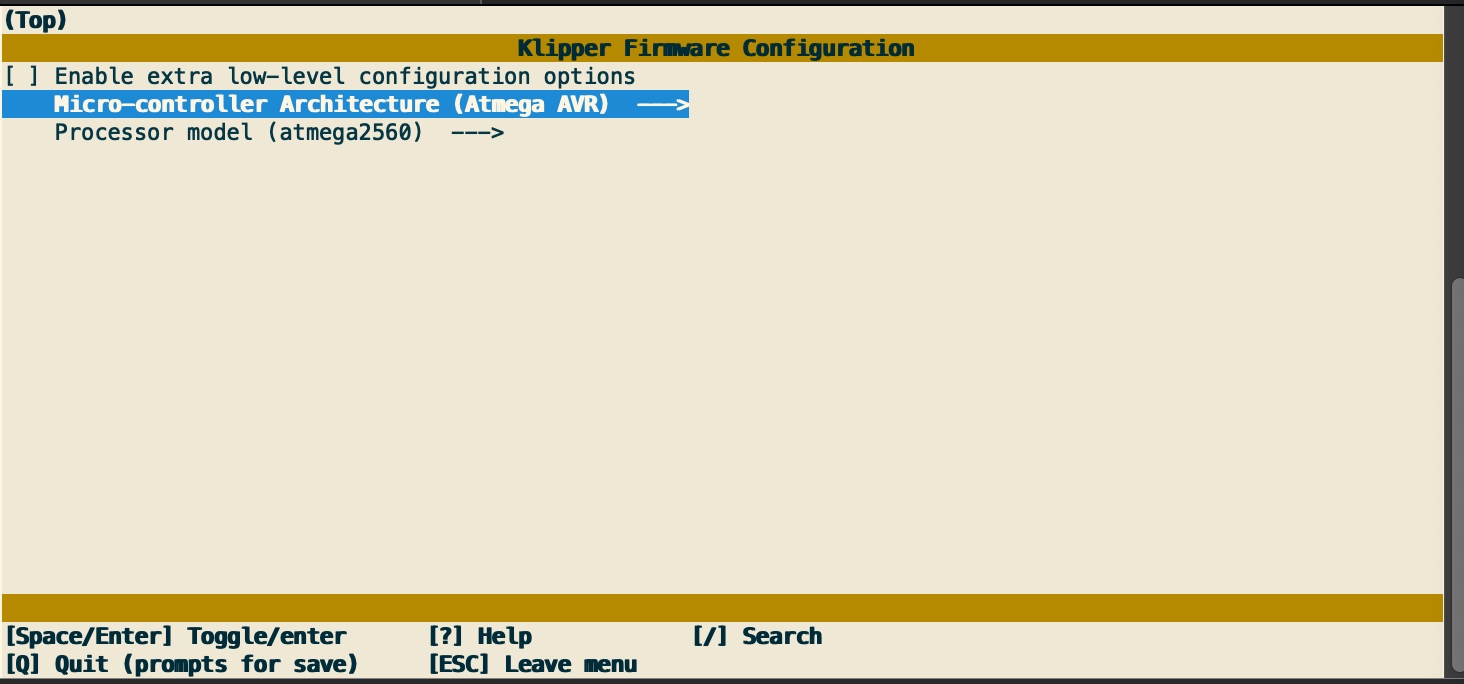
To compile the micro-controller code, start by running these commands on the Raspberry Pi: 在树莓派上编译单片机码用以下命令
cd ~/klipper/
make menuconfig
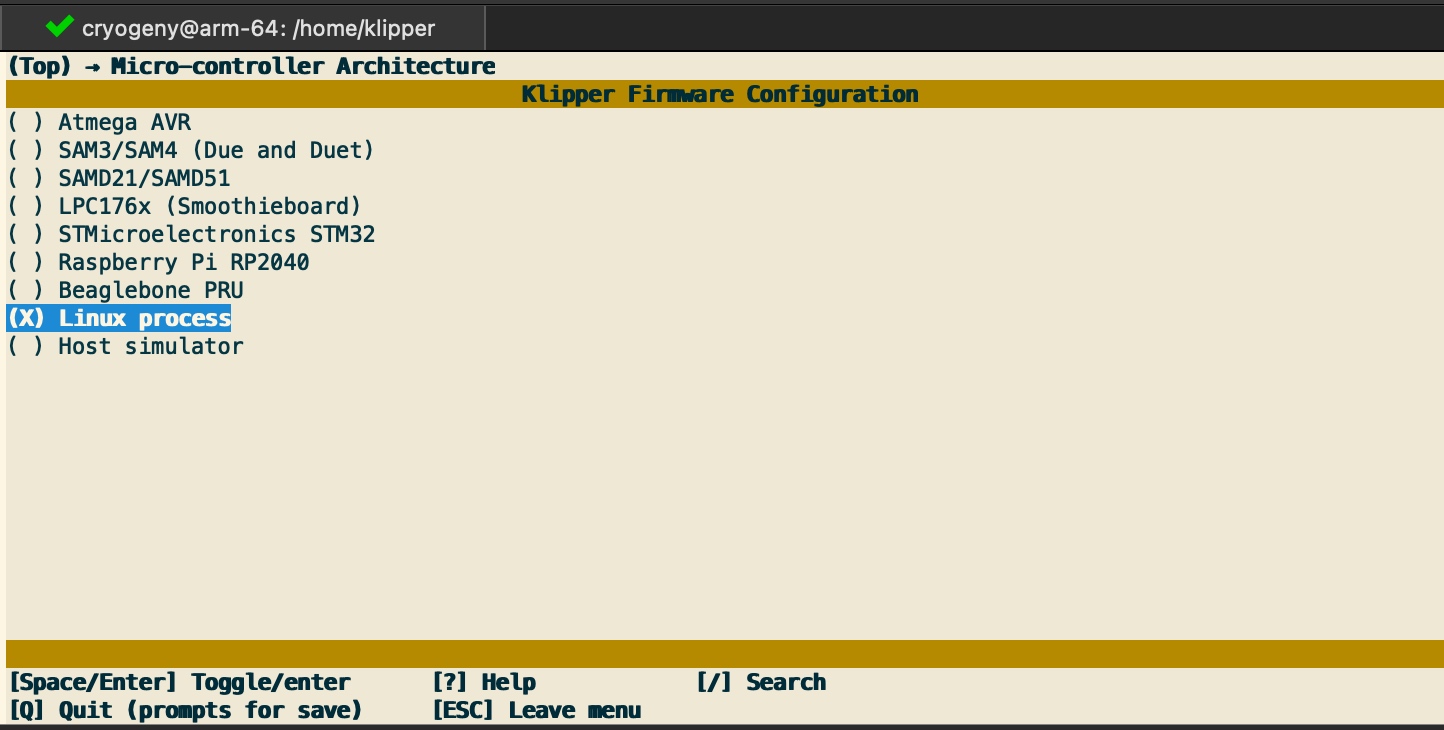
Select the appropriate micro-controller and review any other options provided. 并且选择适当的单片机和其他选项。[由于暂时不太了解atmega avr 和atmega2560 的具体区别并且系统cpu是ARM v8架构,因此如前面两图选了 atmega avr 和 linux process 这两个选项,有大佬清楚清楚的还请科普下;主要看打印机主板采用的芯片,我采用的是bigtree的主板,选xxx]
Once configured, run: 配置好后,运行make程序
make
It is necessary to determine the serial port connected to the micro-controller. For micro-controllers that connect via USB, run the following:
必须要确定单片机的串口。
通过usb连接的,用以下命令
ls /dev/serial/by-id/*
It should report something similar to the following:
会提示如下:
/dev/serial/by-id/usb-1a86_USB2.0-Serial-if00-port0
It's common for each printer to have its own unique serial port name. This unique name will be used when flashing the micro-controller. It's possible there may be multiple lines in the above output - if so, choose the line corresponding to the micro-controller (see the FAQ for more information).
For common micro-controllers, the code can be flashed with something similar to:
对于一般的单片机,可以用类似如下代码刷入
sudo service klipper stop
make flash FLASH_DEVICE=/dev/serial/by-id/usb-1a86_USB2.0-Serial-if00-port0
sudo service klipper start
刷入前注意事项:
Be sure to update the FLASH_DEVICE with the printer's unique serial port name.
* 请通过此前确定下来的串口名来刷入代码
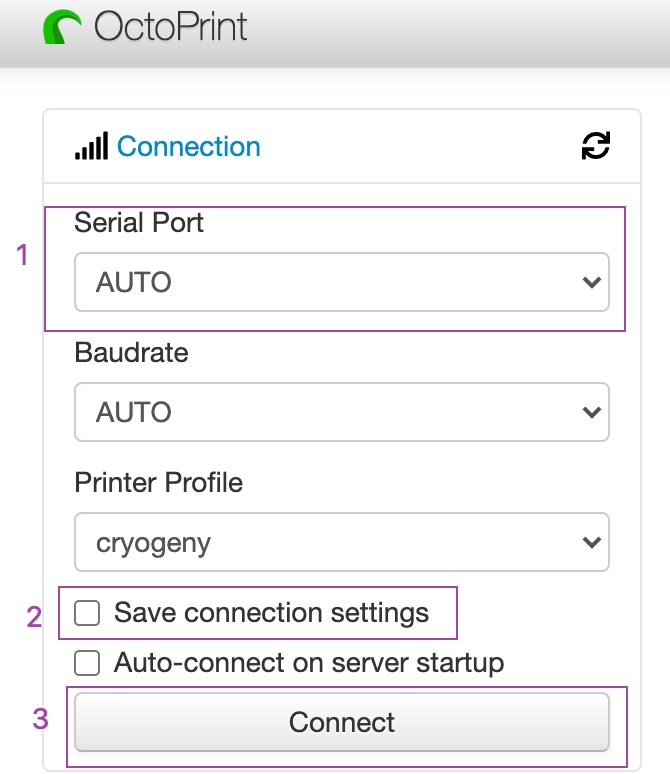
When flashing for the first time, make sure that OctoPrint is not connected directly to the printer (from the OctoPrint web page, under the "Connection" section, click "Disconnect").
* 先在octoPrint的web界面,在connection部分,点击 disconnect,如下图。

Configuring OctoPrint to use Klipper 用Klipper来配置octoPrint
The OctoPrint web server needs to be configured to communicate with the Klipper host software. Using a web browser, login to the OctoPrint web page and then configure the following items:
octoPrint 网页服务器配置好以便与与Klipper主机通讯,登陆octoPrint网页并配置以下内容。
设置 Settings

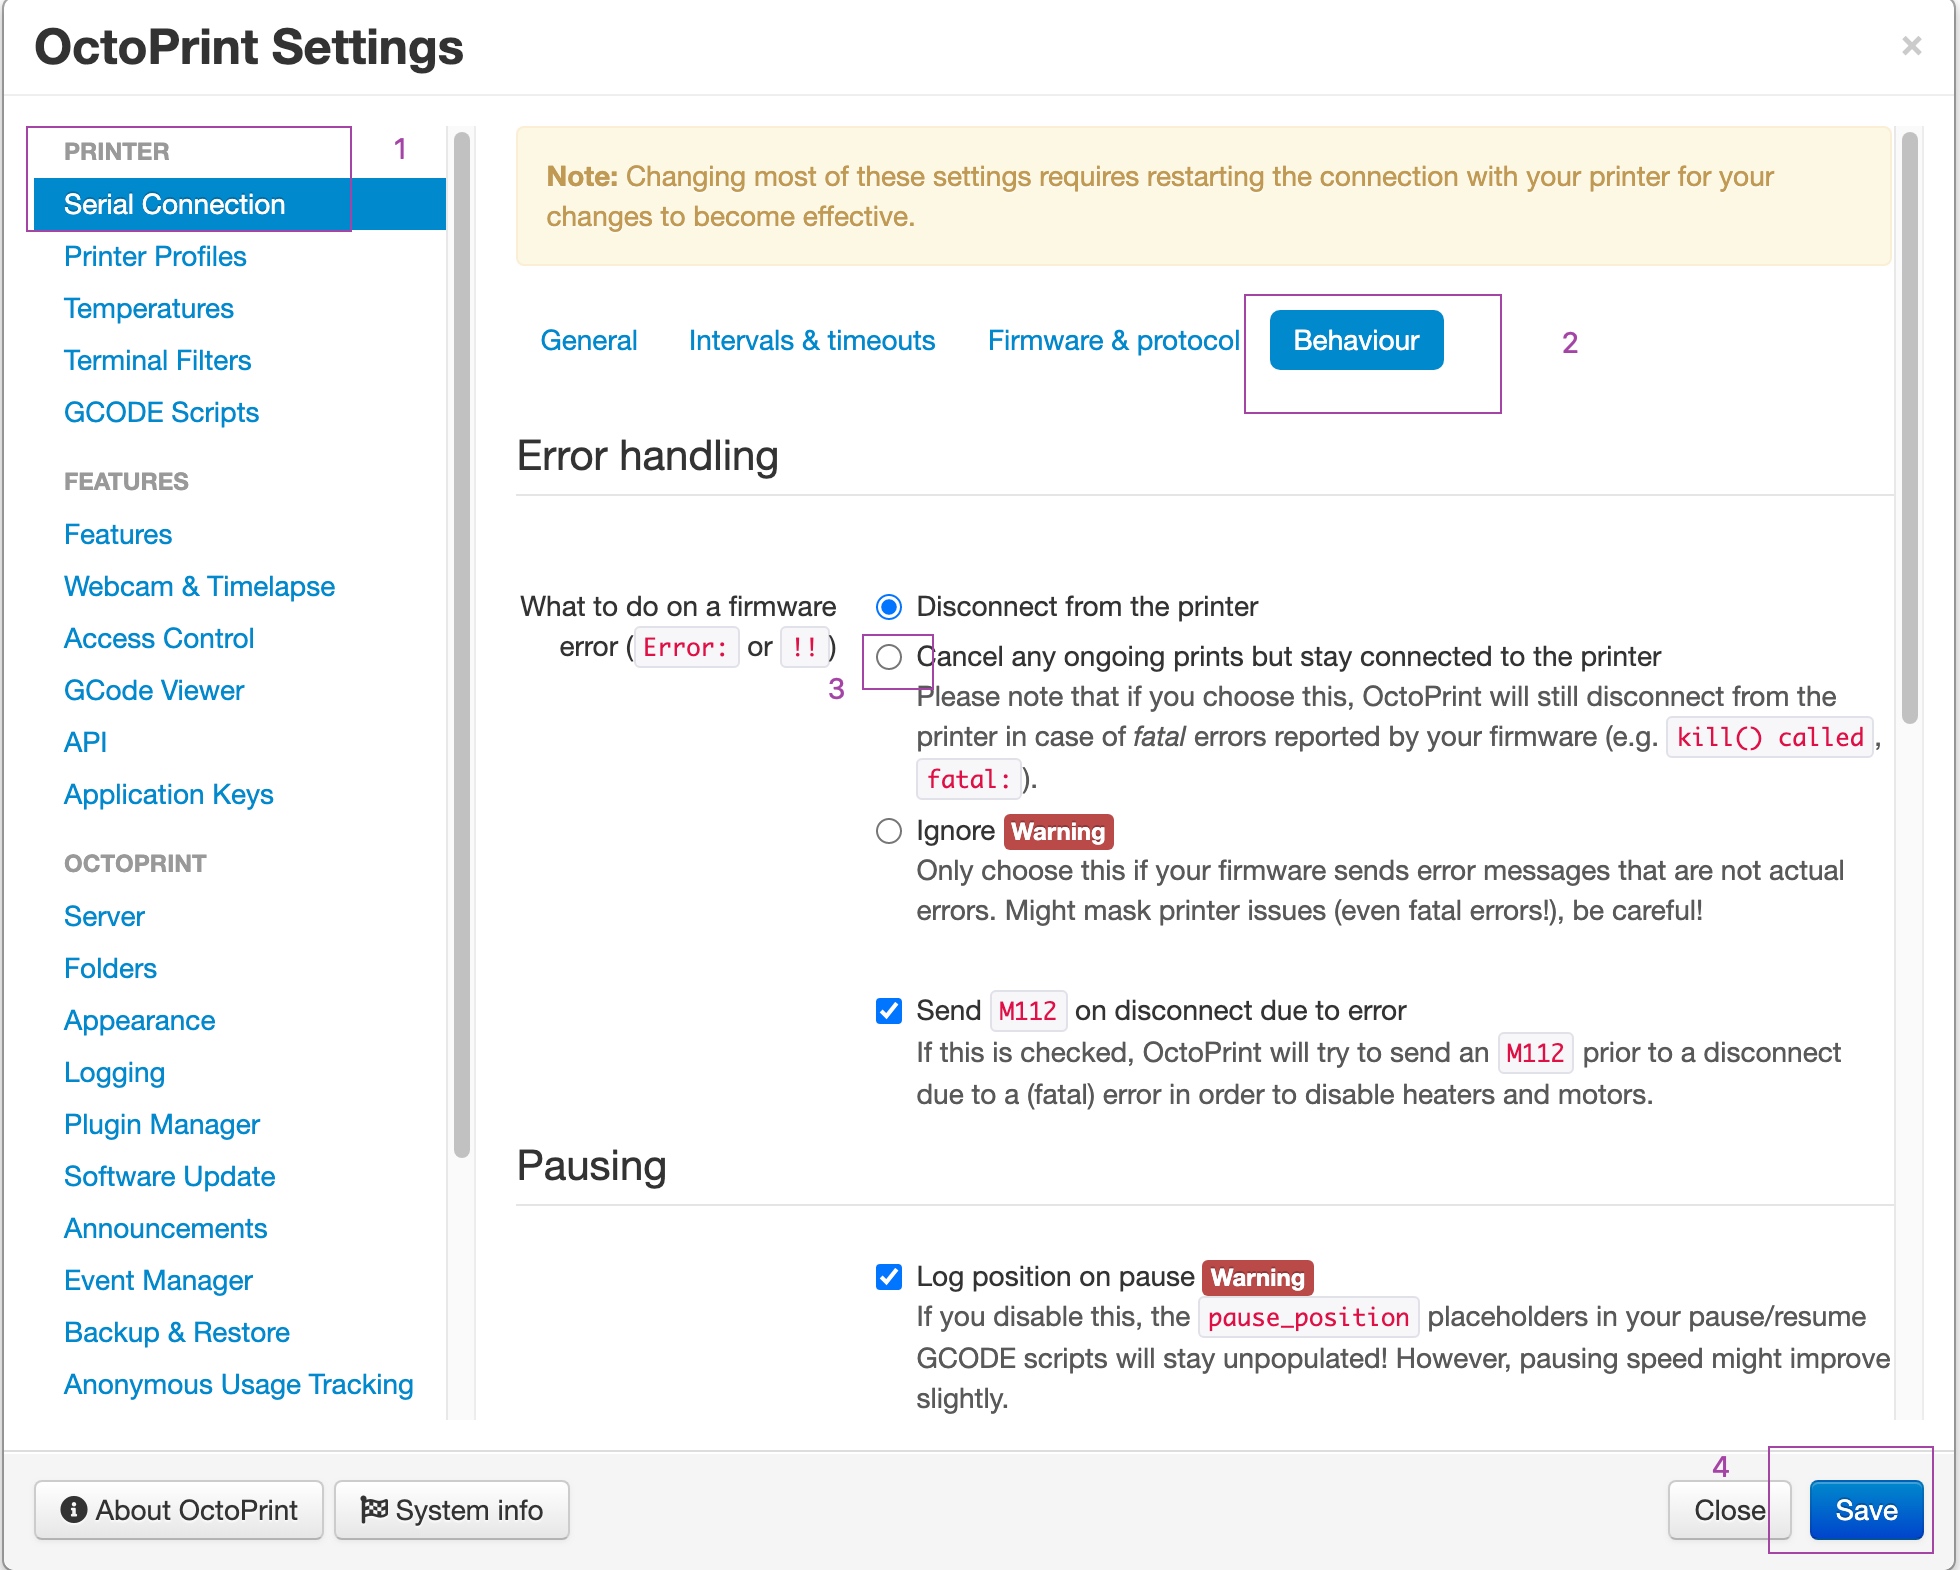
点击如上图的扳手进入设置,按照下图设置
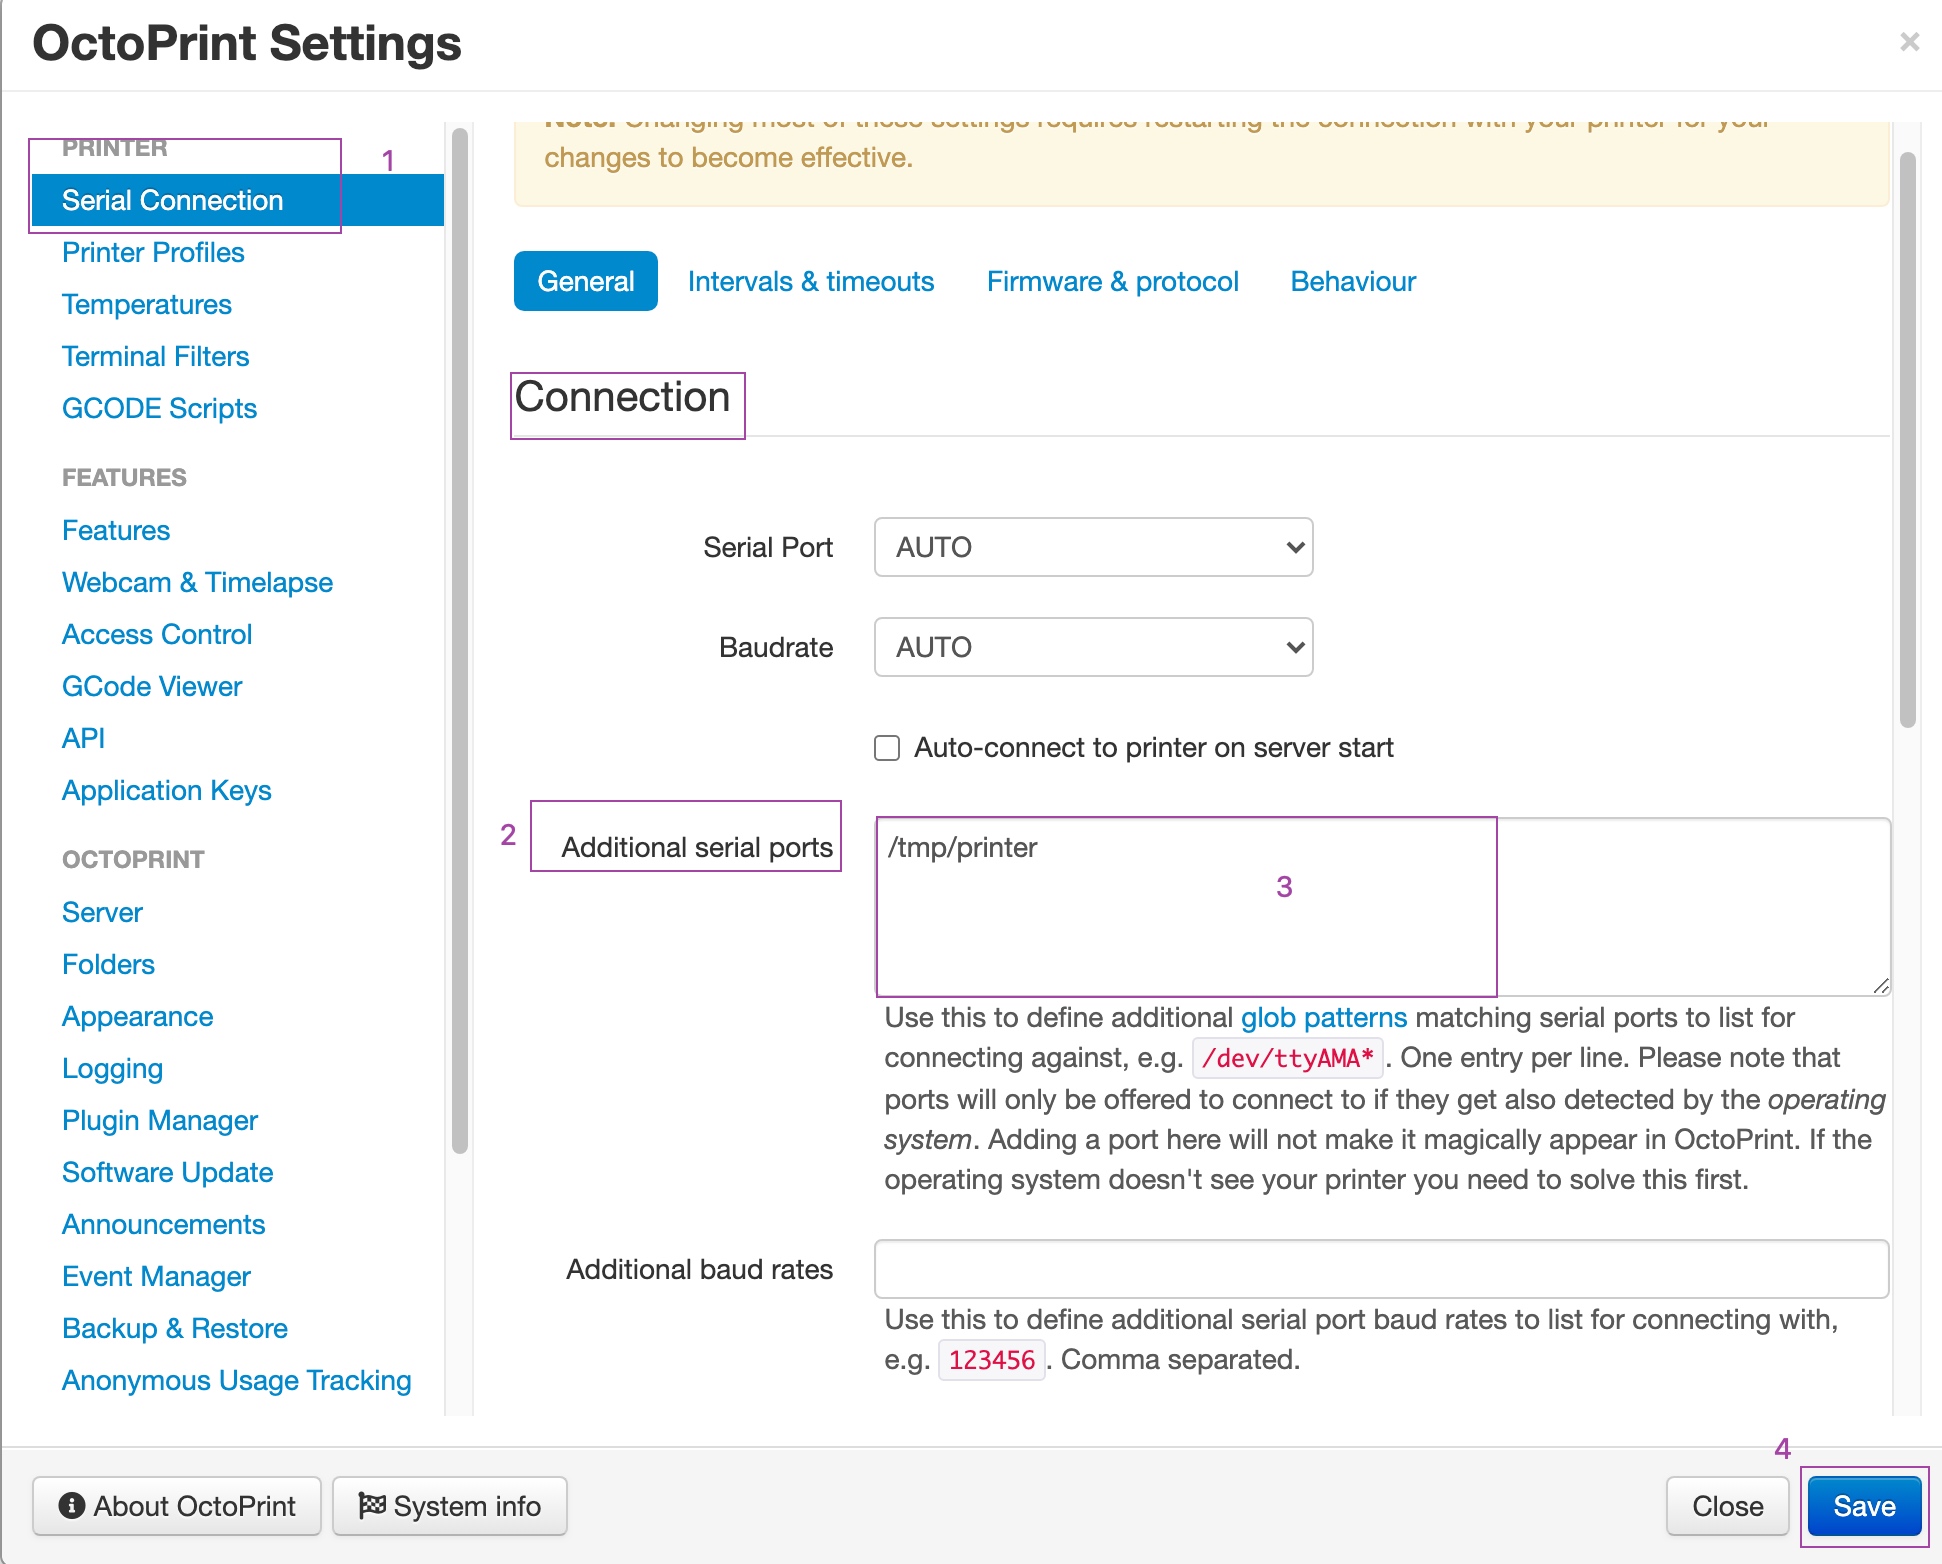
Under "Serial Connection" in "Additional serial ports" add "/tmp/printer". Then click "Save". 点击保存。
Enter the Settings tab again and under "Serial Connection" change the "Serial Port" setting to "/tmp/printer".
重新进入到刚刚页面,在Serial Connection 这个页面的Serial Port段选择刚刚写的/tmp/printer。 注意这里有一个问题,上位机要能连通打印机才能通讯,否则没有显示。务必留意。
In the Settings tab, navigate to the "Behavior" sub-tab and select the "Cancel any ongoing prints but stay connected to the printer" option. Click "Save". 取消数字3所标识选项,然后点保存。
From the main page, under the "Connection" section (at the top left of the page) make sure the "Serial Port" is set to "/tmp/printer" and click "Connect". (If "/tmp/printer" is not an available selection then try reloading the page.)
在首页connection段再次确认Serial Port中的串口名,点击连接。
Once connected, navigate to the "Terminal" tab and type "status" (without the quotes) into the command entry box and click "Send". The terminal window will likely report there is an error opening the config file - that means OctoPrint is successfully communicating with Klipper. Proceed to the next section.
当连接上后,查看Terminal页,输入 status并点击send。这个命令行窗口可能会报不能打开配置文件的错误,这个说明OctoPrint已经成功的和Klipper通讯上了, 进入下一步。特别说明下,能够提示配置文件的错误,说明其已经去读klipper的配置文件了,因此说是通讯成功。
Configuring Klipper 配置Klipper
The Klipper configuration is stored in a text file on the Raspberry Pi. Take a look at the example config files in the config directory. The Config Reference contains documentation on config parameters.
Klipper的配置文件实际是文本文件,下载的文件夹中有config文件夹可以用来作为参考
Arguably the easiest way to update the Klipper configuration file is to use a desktop editor that supports editing files over the "scp" and/or "sftp" protocols. There are freely available tools that support this (eg, Notepad++, WinSCP, and Cyberduck). Use one of the example config files as a starting point and save it as a file named "printer.cfg" in the home directory of the pi user (ie, /home/pi/printer.cfg).
按理说最简单更新klipper配置文件的办法是采用scp 或者 sftp协议直接使用桌面高级文本编辑器对配置文件进行更改。用一个范例配置文件另存为文件名为 printer.cfg放到 用户的home 目录下,进行进一步的修改更新。
Alternatively, one can also copy and edit the file directly on the Raspberry Pi via ssh
另外一种办法是通过ssh,ssh登陆以后,
cp ~/klipper/config/example-cartesian.cfg ~/printer.cfg
nano ~/printer.cfg
Make sure to review and update each setting that is appropriate for the hardware.
根据硬件配置调整设置。
It's common for each printer to have its own unique name for the micro-controller. The name may change after flashing Klipper, so rerun the ls /dev/serial/by-id/* command and then update the config file with the unique name. For example, update the [mcu] section to look something similar to:
每个打印机的单片机有唯一的名字这很正常,这个名字可能在刷入klipper后会发生改变,可以通过命令 ls /dev/serial/by-id/* 来更新含这个唯一名字的配置文件。例如,更新[mcu]部分大概类似如下:
[mcu]
serial: /dev/serial/by-id/usb-1a86_USB2.0-Serial-if00-port0
After creating and editing the file it will be necessary to issue a "restart" command in the OctoPrint web terminal to load the config. A "status" command will report the printer is ready if the Klipper config file is successfully read and the micro-controller is successfully found and configured. It is not unusual to have configuration errors during the initial setup - update the printer config file and issue "restart" until "status" reports the printer is ready.
在这个配置文件被创建和修改更新后,需要重启启动一次,在命令行里直接使用restart命令即可。随后再来一次status命令,会报告说打印机已就绪,当然,前提是klipper的配置文件正确并且单片机通讯也成功。
Klipper reports error messages via the OctoPrint terminal tab. The "status" command can be used to re-report error messages. The default Klipper startup script also places a log in /tmp/klippy.log which provides more detailed information.
Klipper会通过octoPrint的命令行页面报告错误信息,也可以通过status这个命令再度打开错误消息。klipper默认的启动脚本把日志文件放在了 /tmp/klippy.log这里,这个文件会提供更详细的信息。
In addition to common g-code commands, Klipper supports a few extended commands - "status" and "restart" are examples of these commands. Use the "help" command to get a list of other extended commands.
可以用help命令来查看更多增强命令。
After Klipper reports that the printer is ready go on to the config check document to perform some basic checks on the pin definitions in the config file.
在klipper报告说打印机已经就绪后,就可以做配置检查工作了。